Panel Plugin
The Panel() base class creates a new plugin that can be used to create a panel that sits on the left or right side of the Cloud9 user interface. For more information on base classes in general check out the base class guide.
Panels are containers that can be hidden and shown by pressing the button that has a caption describing the functionality of the panel. Panels can be enabled and disabled via the Window menu which hides and shows the button.
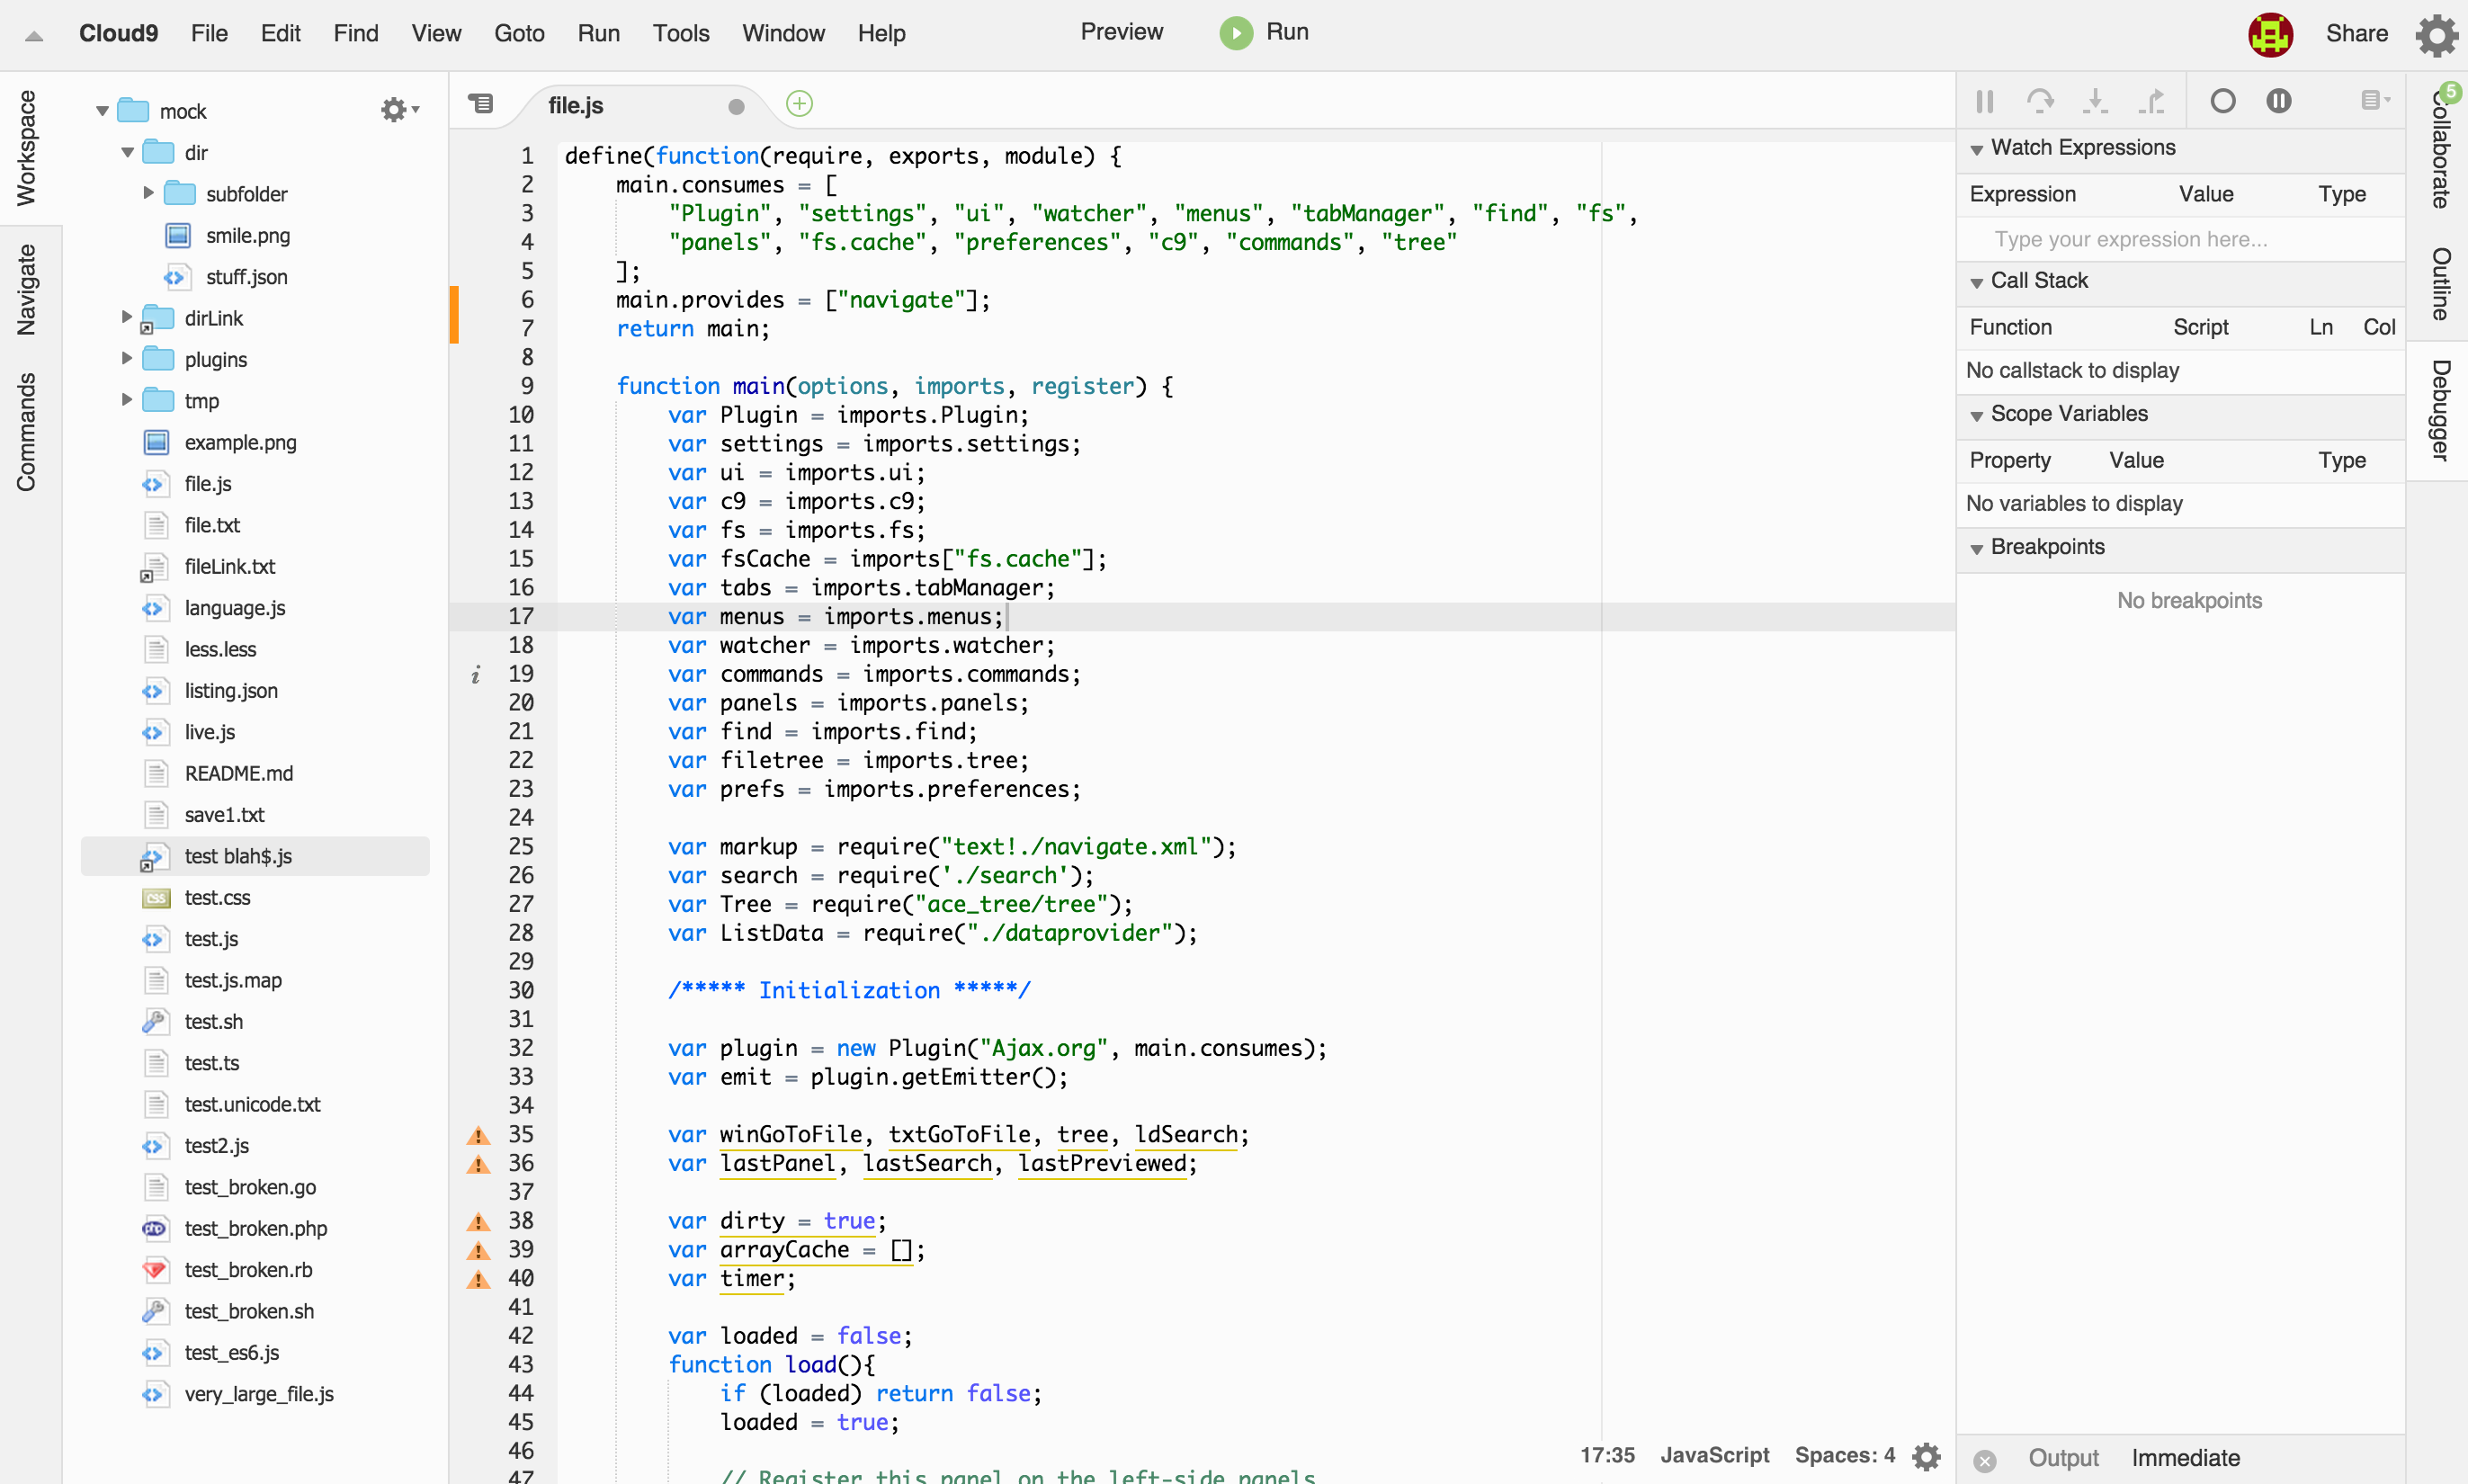
The screenshot below shows three panels on the left and three on the right. On the left side the "Workspace" panel is active and on the right side the "Debugger" panel is active.

Creating a Panel
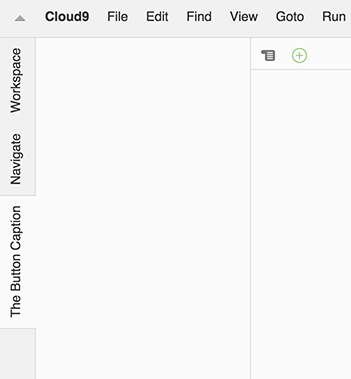
A basic panel on the left side.
var plugin = new Panel("Your Name", main.consumes, {
    index: 300,
    caption: "The Button Caption"
});
Looks like this.

In the same way as with menus the index property determines the vertical position of the button relative to any other panel plugin.
Panel Properties
| index | Determine the vertical position of the button. |
|---|---|
| caption | Sets the text displayed on the button. |
| width | Sets the width of your panel in number of pixels. Note that this is only set if your panel is the first to open, otherwise the existing with of the panel that is open is used. |
| minWidth | Sets the minimal width that your panel can take in pixels. |
| where | Takes "left" or "right" as values to determine the position of the panel. |
| buttonCSSClass | Takes a string that is set as the css class of the panel container. |
| panelCSSClass | Takes a string that is set as the css class of the panel button |
| autohide | Takes a boolean to specify which animation to use when hiding the panel. |
Adding your own contents
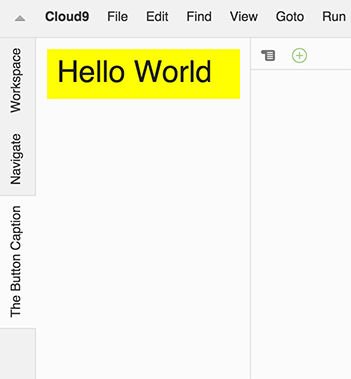
The easiest way to populate a panel is by adding custom html and css. The following example loads css from panel.css and adds a div element to the body of the panel.
var plugin = new Panel("Your Name", main.consumes, {
    index: 300,
    caption: "The Button Caption"
});

plugin.on("draw", function(e){
    // Insert css
    ui.insertCss(require("text!./panel.css"), options.staticPrefix, plugin);

    // Set some custom HTML
    e.html.innerHTML = "<div class='myCSS'>Hello World</div>";
});

// This is only here to make the example run
// for when you are executing this in the console.
plugin.load(); 
Showing and Hiding Panels
Users can hide and show panels by clicking on the panel button in one of the side bars. You can control this behavior and customize it to your needs.
The following common use cases are used by Cloud9:
- Normal - Show the panel when clicking on the button. It won't hide until you click the button again.
- Auto Hide - Show the panel when clicking on the button. It will hide automatically when any other element gets focus. The moving away animation is different.
- Auto Hide + Sticky - Show the panel like in Normal mode when using the button. Have Auto Hide behavior when using the key binding to show the panel.
Auto Hide
To implement a panel that hides automatically when the user focusses something outside of the panel you should set the autohide property to false and call plugin.hide() when an element inside your panel is blurred.
function onblur(e) {
    if (!plugin.aml.visible)
        return;

    var to = e.toElement;
    if (!to || apf.isChildOf(plugin.aml, to, true)) {
        return;
    }

    setTimeout(function() { plugin.hide() }, 10);
}
apf.addEventListener("movefocus", onblur);
Auto Hide + Sticky
To implement the combination of auto hide and a sticky button, toggle the autohide property based on whether the button was used to show the panel.
plugin.on("show", function(
    plugin.autohide = !e.button;
});
Make sure to check the autohide property in the onblur() function.
function onblur(e) {
    if (!plugin.aml.visible || !plugin.autohide)
        return;
Setting the Command
To set the command that toggles your panel call the setCommand() method on your panel plugin. The object that you pass is the same as any other command.
plugin.setCommand({
    name: "commandName",
    hint: "Description of the command",
    bindKey: { mac: "Command-U", win: "Ctrl-I" }
});
Panels API
The panels plugin offers events and methods to listen to state changes and to manipulate the state of the panels. Each panel has a name and this name is used to reference panels when needed.
Resize Contents
After the panel has animated and is fully visible you'll often want to adjust the size of some of the elements in your panel. This is especially true if you are using ace widgets.
panels.on("afterAnimate", function(e) {
    if (panels.isActive("yourPanelName") && treeWidget)
        treeWidget.resize();
});
Showing and Hiding panels
You can retrieve the currently active panel(s) using the panels.activePanels property which returns an array that contains the names of the active panels.
To activate a panel call the activate() method and use deactivate() to hide a panel.
panels.activate("tree");
panels.deactivate("tree");
External plugins can best monitor the following two events to keep track of a specific panel being shown or hidden. The <Name> is the name of the panel with a capital first letter.
panels.on("showPanel<Name>", function(e) {});
panels.on("hidePanel<Name>", function(e) {});
Enabling and Disabling Panels
When a panel is enabled its button is shown in the left or right area of the screen.
panels.enablePanel("tree");The button of a disabled panel is hidden and a user can enable a panel via the Windows menu.
panels.disablePanel("tree");A Full Example
define(function(require, module, exports) {
    main.consumes = ["Panel", "ui"];
    main.provides = ["my-panel"];
    return main;

    function main(options, imports, register) {
        var Panel = imports.Panel;
        var ui = imports.ui;

        /***** Initialization *****/

        var plugin = new Panel("Your Name", main.consumes, {
            index: 300,
            caption: "The Button Caption"
        });

        plugin.on("draw", function(e){
            // Insert css
            ui.insertCss(require("text!./panel.css"), options.staticPrefix, plugin);

            // Set some custom HTML
            e.html.innerHTML = "<div class='myCSS'>Hello World</div>";
        });

        /***** Register *****/

        plugin.freezePublicAPI({

        });

        register("", {
            "my-panel": plugin
        });
    }
});
Updated 9 months ago
