Adding an Installer
The Cloud9 Installer installs dependencies for plugins into the user's workspace. This can be npm modules apt-get or yum packages, tar.gz files that are downloaded et cetera. An installer for your package is a simple .js file that defines the steps that the installer needs to take to install the dependencies. This guide will walk you through the steps for creating your own installer.
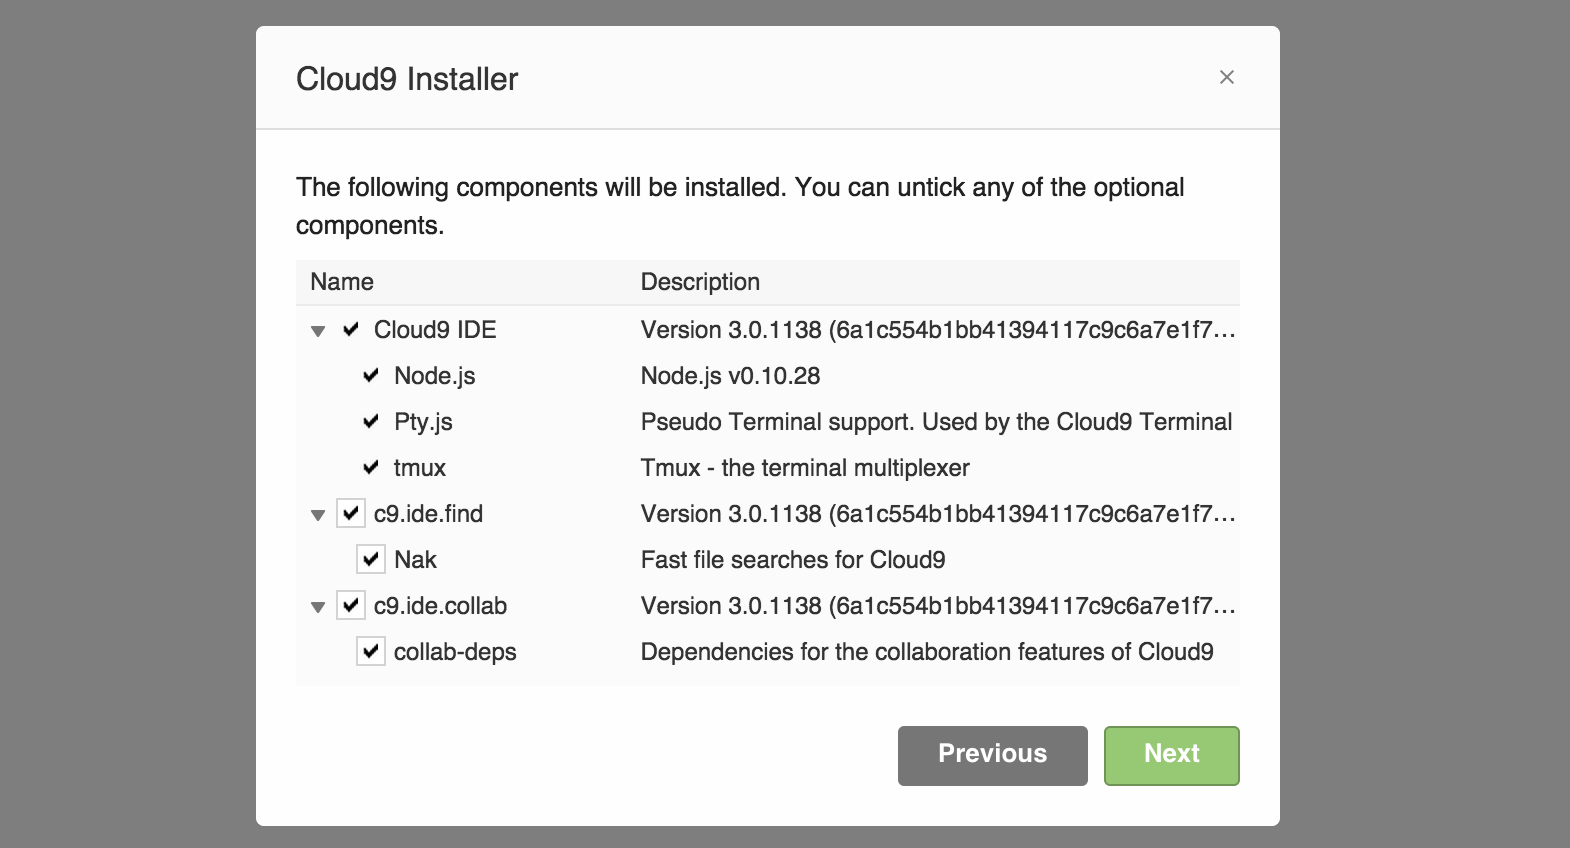
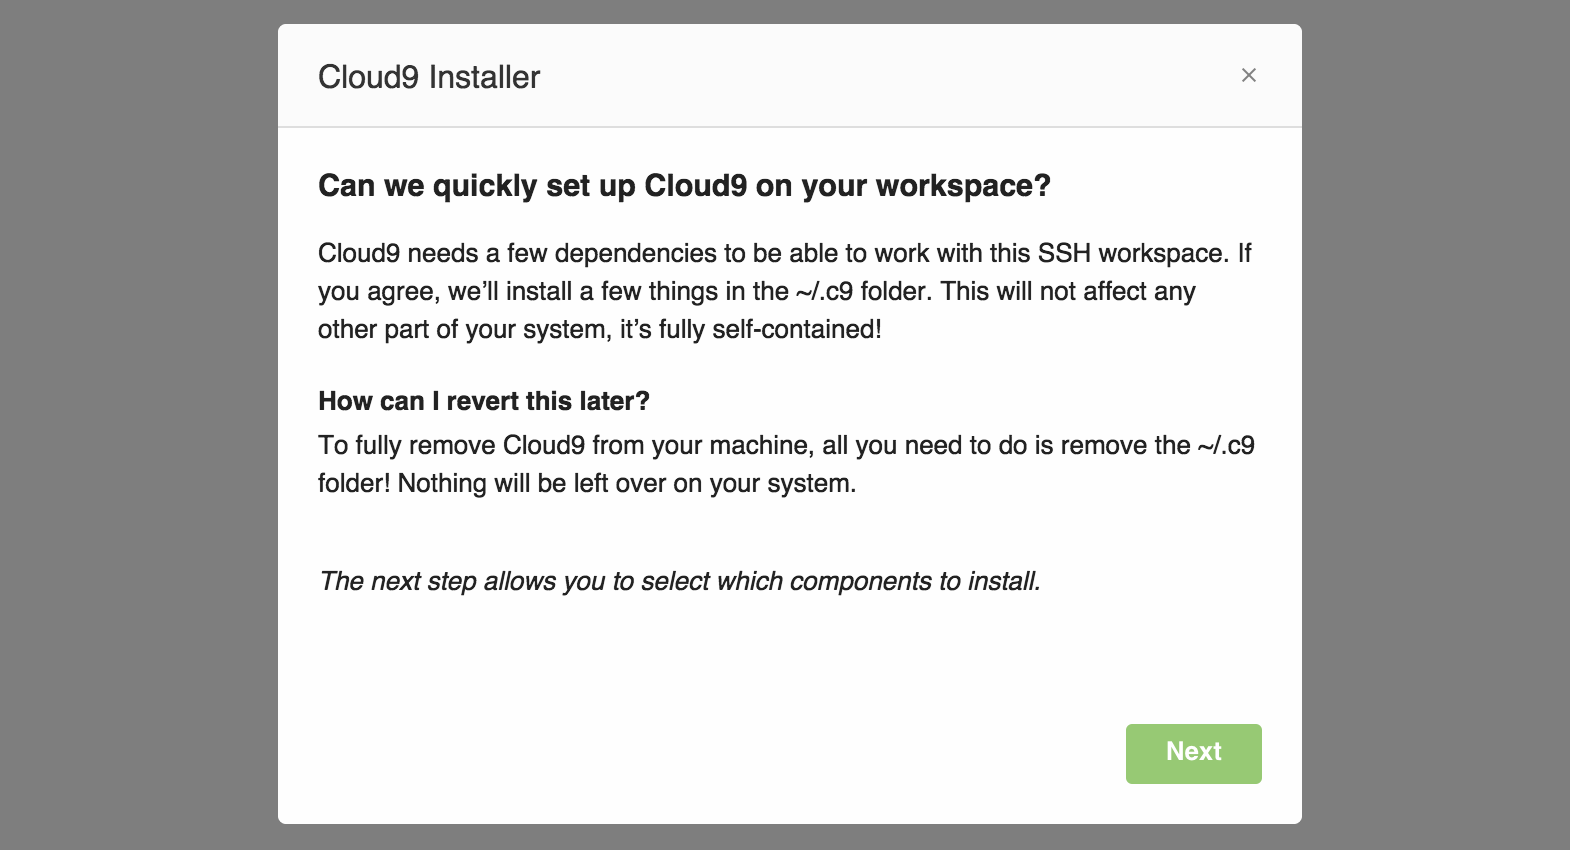
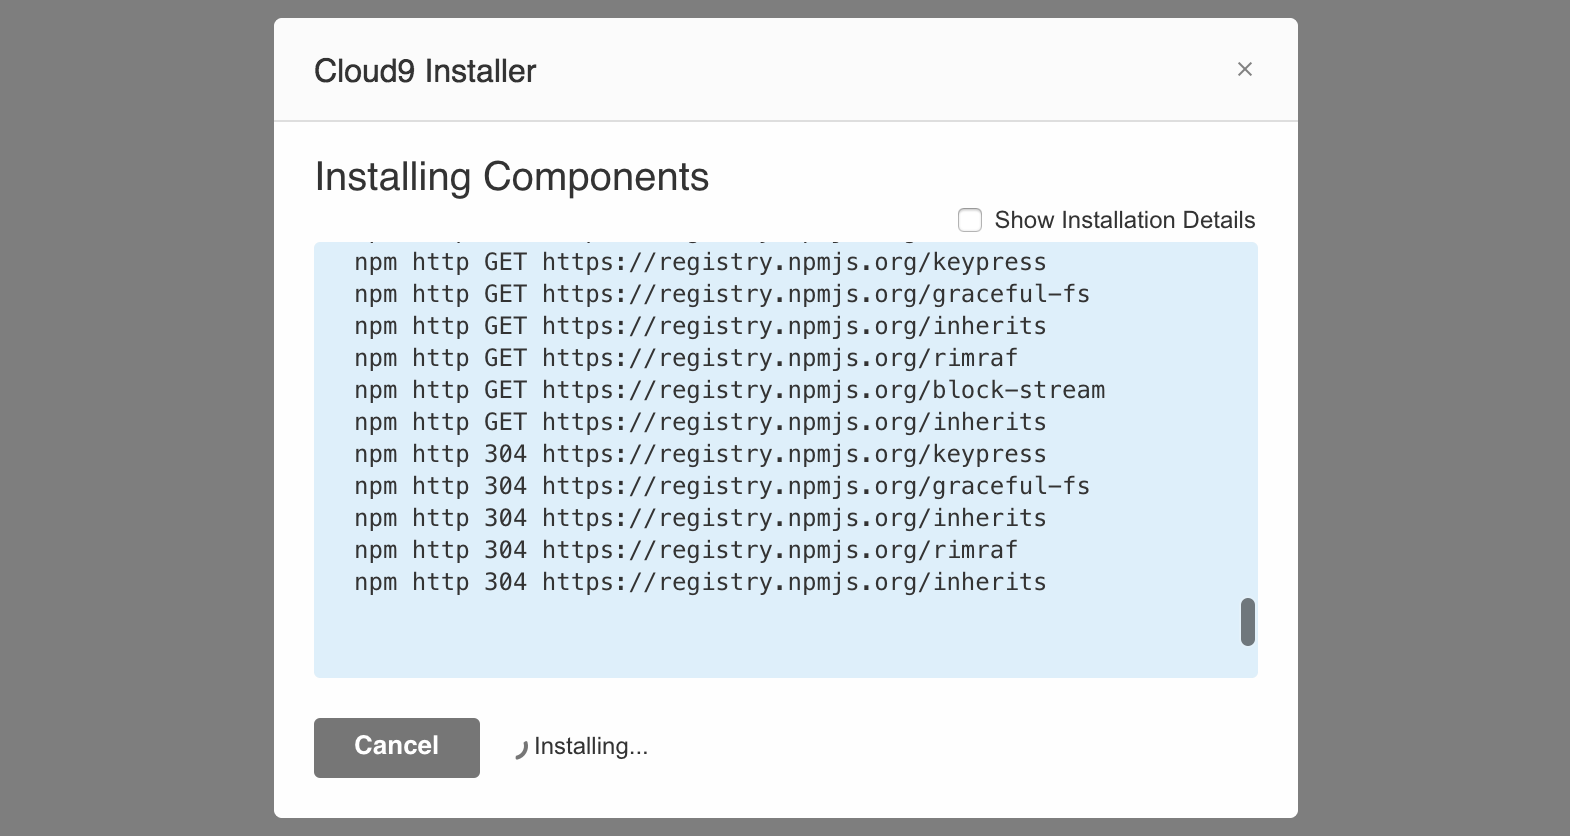
The screenshot below is of the Cloud9 installer running the main Cloud9 install script, which is used when Cloud9 is connected to a workspace that is not hosted on c9.io, such as SSH workspaces or your own local machine or server.

Use cases
You should create an install script when your plugin depends on additional packages that should be installed in the user's workspace. For instance when you are creating a language plugin that uses a server side analyzer, create an install script that installs that analyzer when your plugin gets installed.
Another use case is when you want to configure a workspace to be ready for your framework, library or sdk. Simply create an installer that installs all the components needed by your plugin.
Scaffolding
The basic scaffolding of your installer is the typical AMD module wrapper containing a function that takes a session and options argument. It is common practice to call this file install.js and put it in the root dir of your package.
define(function(require, exports, module) {

module.exports = function(session, options){

};

// version of the installer. Increase this when installer changes and must run again
module.exports.version = 1;

});
The session argument is an installer session. More about this below. The options contain two properties.
| platform | The platform of the workspace. Valid options are 'darwin', 'freebsd', 'linux', 'sunos' or 'win32' |
|---|---|
| arch | The architecture of the workspace. Valid options are 'arm', 'ia32', or 'x64' |
Package.json
Add your install.js script to the package.json file in your package folder to enable the installer. The installer field expects an object with a version field and a main field. The main field is relative to the package root. The version field is the version of your plugin when install.js was updated last.
{
    "name": "yourplugin",
    "version": "1.0.0",

    "installer": "install.js",

    "plugins": {
        "yourplugin": {}
    }
}
For more information see this guide.
Introduction Text
You can optionally set an introduction text that will be displayed to the user on the first page of the installation wizard. If you don't set the introduction text, the first page of the wizard will be the overview page that shows the components that are going to be installed. Use HTML to mark up your text.
module.exports = function(session, options){
    session.introduction = require("text!./intro.html");
Headless InstallationWhen the dependencies for your plugin are all required and you don't want to notify the user of the installation, then leave out the intro text. This will start the installer automatically without presenting a UI to the user. Note that if there is another plugin that triggered the installer a user might see your dependencies listed as well. Those dependencies will be marked as required.
Pre and Post Installation Script
The pre and post installation scripts give you an easy way to execute a bash script before and after the installation process. Note that any failure that occurs in these scripts will fail the entire installation. This enables you to use the pre installation script to check for dependencies and other environmental aspects that might prevent the installation from succeeding. Similarly you can use the post installation script to check whether the installation succeeded.
module.exports = function(session, options){
    session.preInstallScript = require("text!./pre-install.sh");
    session.postInstallScript = require("text!./post-install.sh");
Adding an Installation Task
Each installation session consists of installation tasks. The definition of a task consists of a set of options, such as a name and description to display in the UI, and a set of sub-tasks that tell the installer what to install where and which installation methods to try.
The following example creates a task that installs a single npm module. The task is optional (the user can choose to not install this item) and it will be installed in the ~/.c9 directory.
session.install({
    "name": "Sequelize",
    "description": "Sequalize NPM module",
    "cwd": "~/.c9",
    "optional": true
}, {
    "npm": "[email protected]"
});
Similar to the optional field, set the ignore field to false to set the checkbox for this component unchecked by default.
Options
The first argument to the session.install() method is the options object. The options object is passed to any of the package managers and thus can contain any arbitrary options for that package manager.
The table below lists the four default fields of the option object.
| name | The name of the item that is installed |
|---|---|
| description | The description of the item that is installed, explaining to the user what it is for |
| cwd | The working directory where the installation will take place |
| optional | Whether the user can choose to not install this package |
Theoptionsargument is optional and any task that is lacking an options object will not show up in the installer ui.
Installation Description
The installation description is a declarative format to describe the steps involved in installing dependencies. Simple tasks might have a single step, others might have multiple steps.
To make the examples more clear theoptions argument is left out.
This is an installation step with one task; the installation of an npm module.
session.install({
    "npm": "[email protected]"
});
This is an installation step with two tasks; the installation of two npm modules.
session.install({
    "npm": ["[email protected]", "[email protected]"]
});
Please find a complete list of supported package managers further down in this guide
Multiple steps can either be AND - the tasks will all be executed, or OR - only one tasks succeeds.
AND
The following example comes from the c9.ide.collab plugin and it installs SQLite. For this to work, we need the npm module and sqlite database installed and a symlink created. The following definition does just that.
session.install([
    {
        "npm": "[email protected]"
    },
    {
        "tar.gz": {
            "url": "https://raw.githubusercontent.com/c9/install/master/packages/sqlite3.tar.gz",
            "target": "~/.c9/lib/sqlite3",
            "dir": "sqlite3"
        }
    },
    {
        "symlink": {
            "source": "~/.c9/lib/sqlite3/sqlite3",
            "target": "~/.c9/bin/sqlite3"
        }
    }
]);
OR
Sometimes you want to try different strategies that lead to the same or a similar result. The following example comes from the main cloud9 install script and it installs tmux. It first tries one of the package managers and if those don't work it tries a bash script instead.
session.install({
    "ubuntu": "tmux",
    "centos": "tmux",
    "bash": require("text!./tmux.sh")
});
AND and OR
Simply combine the AND and OR approach as you need. The following example installs tmux through one of two package managers and then creates a symlink through a small bash script.
session.install([
    {
        "ubuntu": "tmux",
        "centos": "tmux"
    },
    {
        "bash": 'ln -sf $(which tmux) ~/.c9/bin/tmux'
    }
]);
A special case is the inverse of this; combining OR and AND. To do this there's a special command called install. The following example shows how to use this to get to the actual installation step used by the main Cloud9 installer. It will try the step under install. If that fails it will try the next one, which is a bash script.
session.install({
    "install": [
        {
            "ubuntu": "tmux",
            "centos": "tmux"
        },
        {
            "bash": 'ln -sf $(which tmux) ~/.c9/bin/tmux'
        }
    ],
    "bash": require("text!./tmux.sh")
});
Package Managers
A "package manager" is a plugin that performs one step in the installation process. In the examples above we've seen tar.gz, bash, ubuntu and centos. Below you'll find each of the default package managers and the options that they take.
Anyone can create custom package managers. Check out this guide for more information.
Ubuntu (Debian)
Use this package manager to install apt-get packages into the workspace. It accepts a single argument, which is a string specifying the package to install.
{
    "ubuntu": "tmux"
}
Centos (RHEL, Fedora)
Use this package manager to install yum packages into the workspace. It accepts a single argument, which is a string specifying the package to install.
{
    "centos": "tmux"
}
NPM
Use this package manager to install npm packages into the workspace. It accepts a single argument, which is a string specifying the package to install.
{
    "npm": "[email protected]"
}
tar.gz
Use this package manager to install tar.gz packages from disk or from urls. If a url is specified it will download the package and untar.gz it into the target directory. If a url field is not specified, a source field must be present. When a dir field is specified it will expect the package to contain that directory and will move all its contents into the target directory.
Note that specifyingdir will assume that target is a directory path specifically for this package and it will first delete any pre-existing directory before untarring
{
    "tar.gz": {
        "url": "https://raw.githubusercontent.com/c9/install/master/packages/sqlite3.tar.gz",
        "target": "~/.c9/lib/sqlite3",
        "dir": "sqlite3"
    }
}
You may wonder why in the example above we don't set the target field to "~/.c9/lib". The reason is that tar.gz will fail if the ~/.c9/lib/sqlite3 directory already exists. Doing it as specified above will always make sure that directory is removed prior to untarring.
symlink
Use this package manager to create a symlink from source to target.
{
    "symlink": {
        "source": "~/.c9/lib/sqlite3/sqlite3",
        "target": "~/.c9/bin/sqlite3"
    }
}
bash
Use this package manager to execute a bash script.
{
    "bash": require("text!./node.sh")
},
{
    "bash": 'ln -sf $(which tmux) ~/.c9/bin/tmux'
}
Starting the installation
At the end of your installation script you must call session.start() to start the installation and let the installer know your session is ready. This allows you to perform asynchronous calls in your installer before it is started.
session.start();
Full Example
This is the main Cloud9 installation script.
define(function(require, exports, module) {

module.exports = function(session, options){
    session.introduction = require("text!./intro.html");
    session.preInstallScript = require("text!./check-deps.sh");

    // Node.js
    var NODEVERSION = "v0.10.28";
    var nodeName = "node-" + NODEVERSION + "-"
        + options.platform + "-" + options.arch;

    session.install({
        "name": "Node.js",
        "description": "Node.js " + NODEVERSION
    }, [
        {
            "tar.gz": {
                "url": "http://nodejs.org/dist/" + NODEVERSION + "/" + nodeName + ".tar.gz",
                "target": "~/.c9/node",
                "dir": nodeName
            }
        },
        {
            "bash": require("text!./node.sh")
        }
    ]);

    // Pty.js
    session.install({
        "name": "Pty.js",
        "description": "Pseudo Terminal support. Used by the Cloud9 Terminal",
        "cwd": "~/.c9"
    }, {
        "npm": ["node-gyp", "[email protected]"]
    });

    // Tmux
    session.install({
        "name": "tmux",
        "description": "Tmux - the terminal multiplexer",
        "cwd": "~/.c9"
    }, {
        "install": [
            {
                "ubuntu": "tmux",
                "centos": "tmux"
            },
            {
                "bash": 'ln -sf $(which tmux) ~/.c9/bin/tmux'
            }
        ],
        "bash": require("text!./tmux.sh")
    });

    // Show the installation screen
    session.start();
};

});
Updated 8 months ago
